extra for speeded up shipping. Latex can't sit and cure b4 the next layer is
added. The new layer can peel off. Heading to Arlene's Artist Supplies, Albany, NY, to head off the possibility of a mold making disaster!
|
Encountered unexpected delay. The supply company held onto my order for more latex last Monday. I called yesterday and it still hadn't been shipped! This was Holden's Latex in NYC. I'm very surprised by this failed transaction! I cancelled by order with them and re-ordered from Dick Blick. I paid a little
extra for speeded up shipping. Latex can't sit and cure b4 the next layer is added. The new layer can peel off. Heading to Arlene's Artist Supplies, Albany, NY, to head off the possibility of a mold making disaster!
0 Comments
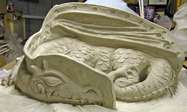 Button Holes Added Partition with button holes for latex to be molded against. These will ensure that the opposite partition meshes perfectly in line with this one. 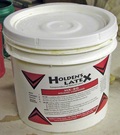 The "Evil" Lid Here's how a gallon of Holden's Latex looks in its container. Seems innocuous enough, right? WRONG! Don't underestimate the power of the Plastican pail to drive you mad trying to get it open. But I worked out a safe way to do it without injuring yourself. And without damaging the pail, exposing the contents to air which would cure the latex and destroy its usefulness. 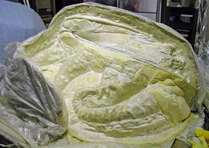 Latex Layer 10 Foam filled in where plaster would otherwise cause trouble with removing the cast. Latex painted over all. This was last night's final coat before I ran out of latex. I hope the 2 gallons I ordered will arrive soon. If the latex vulcanizes, it won't accept any more coats; they'll peel off. An e-book tutorial that I'm thinking of creating will fill in all the missing details on creating a latex mold for a large sculpture. More on this to come.
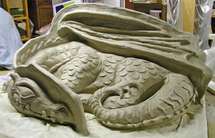 Dragon With Partition Wall This is how it looked after a clay partition was added to divide the dragon roughly along its spine and the edge of its left wing. The clay partition is for blocking a section of the dragon off from the rest of it. I'm going to divide this dragon into 3 separate sections painted with latex and backed by a rigid support mold made of Forton MG and hydrocal. Each section will interlock to form the whole dragon, but can be broken down into individual pieces for storage and easier transport. The only clay I had on hand was very close in color to the clay I used to create the model. This approach is not ideal and I don't recommend it to anyone without lots of experience working with clay. Many people use plasticene or other similar polymer clay to make the partition wall. I don't use it very often and don't have much of it. It's harder to smooth against the model to create the needed seal to prevent seepage of latex beyond where you want to allow it to go. This way was the least costly way to go for me. Contrasting color would make it easier to see the partition when it's time to remove it. I only had this color ready for use and didn't want to wait for my reddish clay to soften enough to use instead. I didn't think of adding water to the red clay soon enough that it was ready when I got to this stage. I tried adding green food coloring to the clay but it didn't show up. I know I could use iron oxide or some other oxide, but I don't want to make a permanent change to the partition wall clay. I'd like it to stay as close to its original makeup as possible so that there are minimal surprises if I ever re-purpose it and kiln fire it. After I'm done applying the many layers of latex, the wall has to be removed. It will separate from the clay of the dragon due to a difference in texture and level of dryness between the 2 clays. This works well as long as you remember never to wet the partition wall clay. It it's sticky from wetness, it will adhere too well and be more inclined to become permanently enmeshed with the other clay. This is where expertise comes into play. Let's hope I'm as good at this as I aspire to be and that there won't be much trouble separating the 2 clays without distorting my model when that stage of the game arrives. 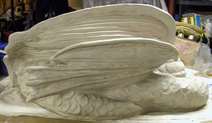 Partition from Backside This shows the dragon from the backside. The clay partition runs along the edge of the upper wing. Then down to the table base at left. Plastic sheeting must be already laid in place on table base wherever the partition and forthcoming latex and plaster layers will be applied. The lower wing in the foreground is left untouched. It will be in a separate section. The 3rd section will consist of the area between the 2 wings and its continuation down to the table base. One of its edges will mesh with the 1st section along the upper wing and along the hind part of the tail. I may decide I need to make more than 3 sections. There's still time to decide. 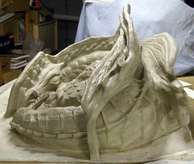 Wing Revisions and Partition View 3 I wanted to show this angle to reveal the changes I made to the edges of the wings. In a prior step, before starting on the partition wall, I removed the squareness of the upper wing. Then I saw the need for changes to the lower wing. I removed a small piece of wingtip that protruded so much, it looked too vulnerable to breakage. I also added more bulk to the edges of the wingtips to reinforce them and match them more closely to the upper wing. I added texture lines to the inside of both wings. This photo also gives a fuller picture of the way the partition slopes along the dragon's contours. And it nicely shows off the extra details I added to the spine, don't you think? 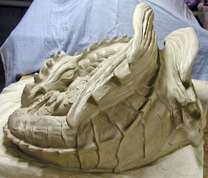 Dragon Peacefully Tolerating Anatomy Changes I'm still actively pursuing the creation of the dragon. He needed many additions of detail. I have to get him at the final stage before starting to create the mold. Once I start painting on the latex, there's no going back and making any more changes. The above picture is an example of things I saw that needed a changes. The squared wings edges no longer fit (visually) with the newly added top edge which was curved and not squared off. I also wanted the lines of the newly added inner wing folds to be more even. I've made these changes since taking the picture. It has sat overnight to allow the changes to set up a little harder. Some of the other considerations I've had to take my time about were not leaving any areas that weren't properly smoothed, no weak areas that will easily break if the wall is too thin, making deeper lines to define facial, claw, and other important feature. Then there were sessions of adding details to the wings and scales to the whole body. These can't be added once the dragon is painted with latex. I had to break the work up into sessions. I work until exhaustion sets in, then I stop when I realize I need to eat, sleep, or rest. Another factor that materialized was that I realized I needed to have help extending the surrounding boards of the surface upon which the dragon rests. The dragon's dimensions get widened with the addition of the layers of latex, and even moreso when in the next step, I add the Forton MG mother mold. Thankfully, my hubby Peter is very handy and helped enormously with adding and attaching pieces of board to all 4 edges of the original board upon which the dragon sits. Forton MG is modified gypsum. It's much stronger than regular plaster. Because it is, it's ideal as a mother mold. The walls can be made thin, which greatly reduces the weight of the sculpture. This is s big help when the size is this large. Even so, the walls get expanded outward and must be supported by something solid underneath them as the Forton sets up. It starts out as a liquid, and gradually solidifies. It can't be allowed to droop below the level of the base board. This causes problems later on. I.e., the cured mother mold won't sit flatly when it's placed on a flat surface for storing. I estimate I must have used at least 150 pounds of clay to create the dragon. If it was solid clay, I would have used much more. Because we anticipated an increase in weight when the molds were created, we had to move the dragon off of its original table onto a table that my husband had to reinforce with boards that could handle the extra weight. The last thing that has to be done is cleaning up all the clay crumbs. They seem to sprout from out of nowhere. They're usually a side effect of the creation process. It involves laying on gobs of clay and rubbing at them with moistened fingers and tools to form the surface shapes. Crumbs are a big NO when painting on the latex. They can't be left on the surface that's going to be painted with latex. They have to be removed from the edge between the plastic and the base of the work. They constantly fall and end up there as I work on creating and fixing the clay model. If they're not removed, they end up back on the surface of the clay model if the plastic under it is shifted even slightly. It's time to get back to work.
|
Joyce JacksonMultimedia artist in clay, paint, and jewelry. Part-time online bookseller. Archives
November 2018
Categories
All
|